
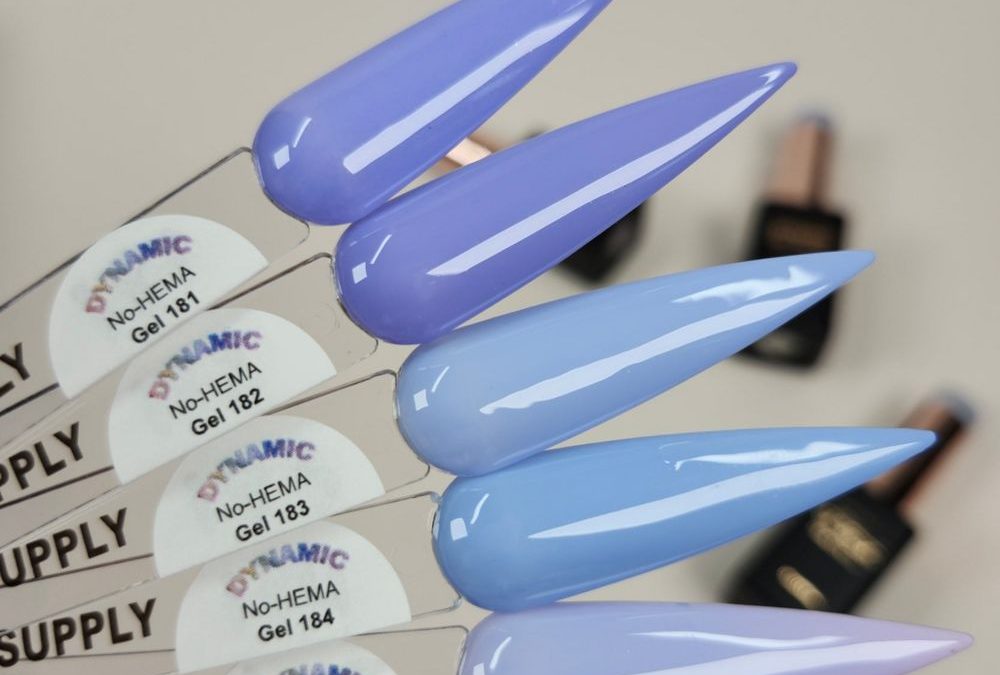
Imagine a client at your station, sunlight spilling across the table as they ask for a soft ombré that reads fresh and wearable for spring. We set up our lamp, pick two cool pastels, and go straight into a layered blending workflow that photographs like a pro.
Key takeaways:
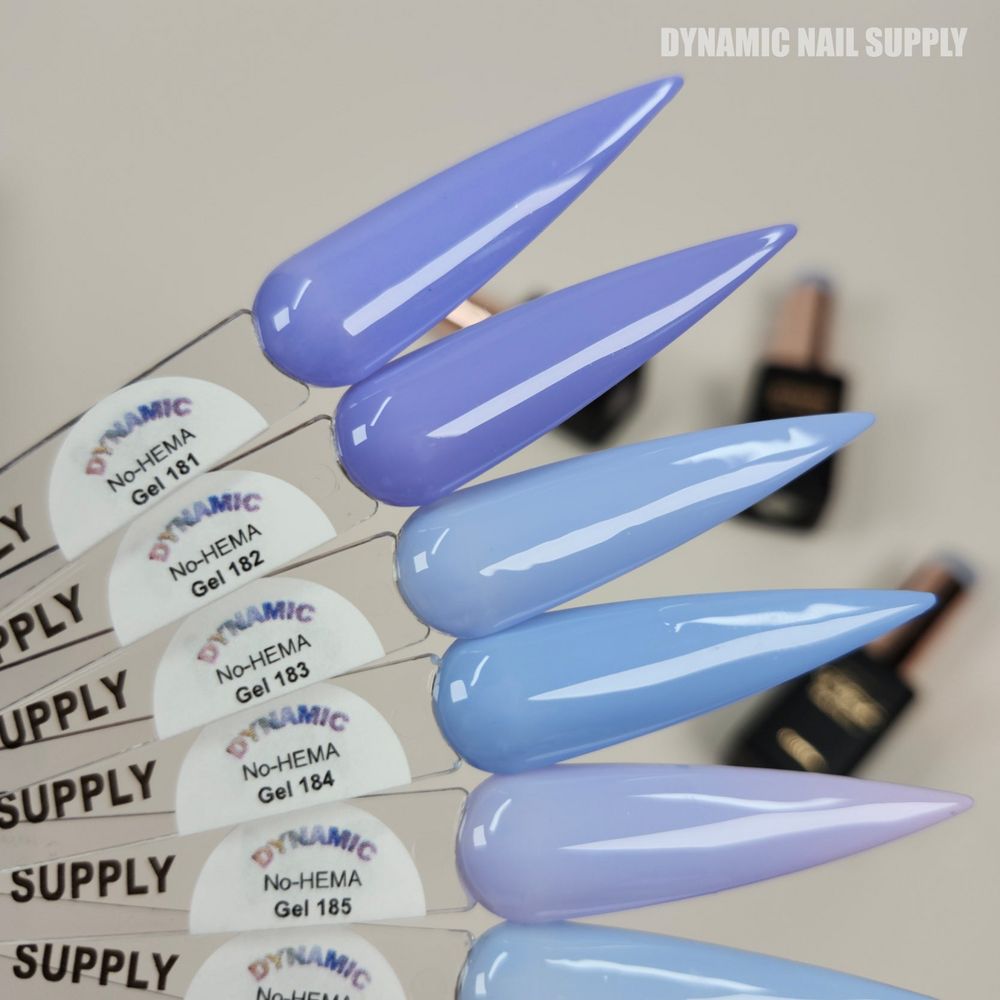
- Use two cool crème shades—medium lilac and baby blue—applied in thin layered passes for a smooth fade.
- Work wet-to-wet with a small, flat blending brush and feather strokes; cure short passes to lock progress.
- No-HEMA crème gels give full opacity and high gloss that photograph cleanly without shimmer.
Prep: Start Clean
We always begin with a salon-standard prep: remove oils, lightly buff to a uniform matte surface, and wipe with a lint-free pad and cleanser. Thin, even base bonding is essential—too thick and the fade will slump during curing; too thin and the pigments may streak. For long nails or extensions, file the sidewalls and free edge to create a continuous surface for the gradient to read smoothly in photos.
Tools & materials: keep it compact
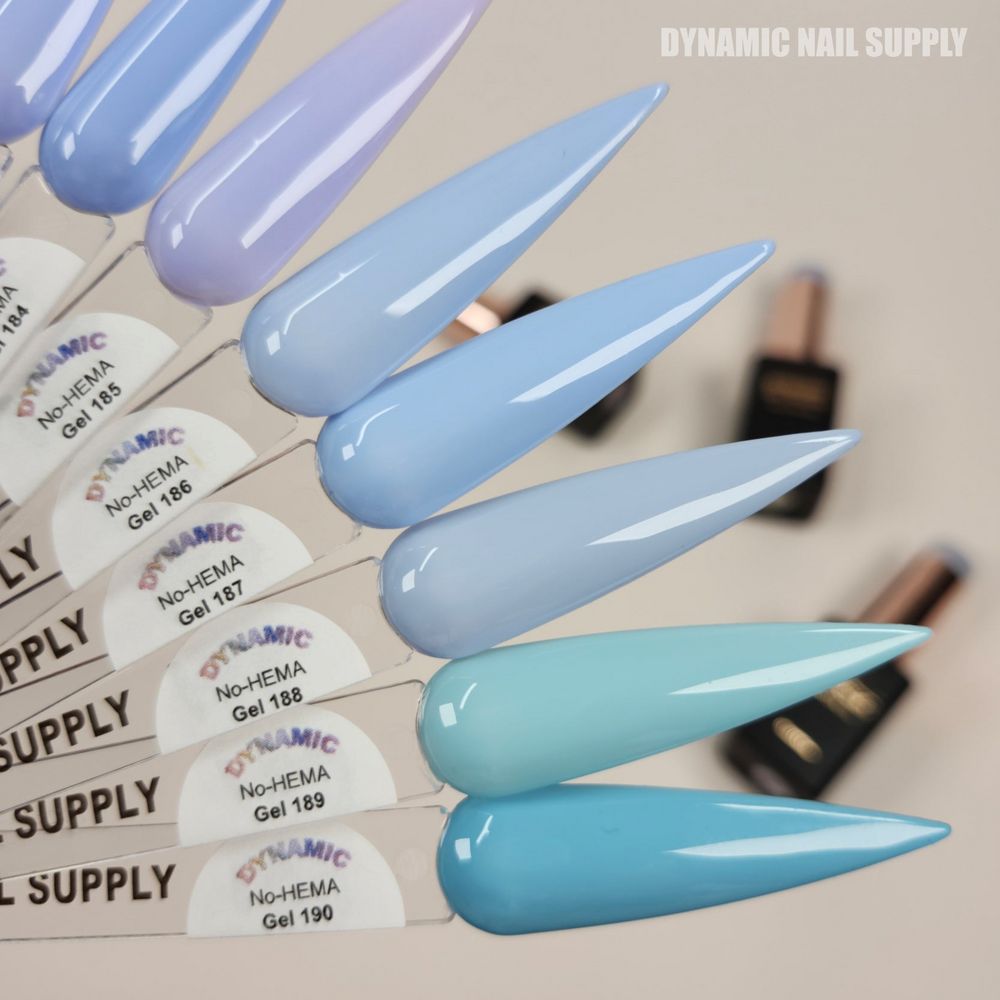
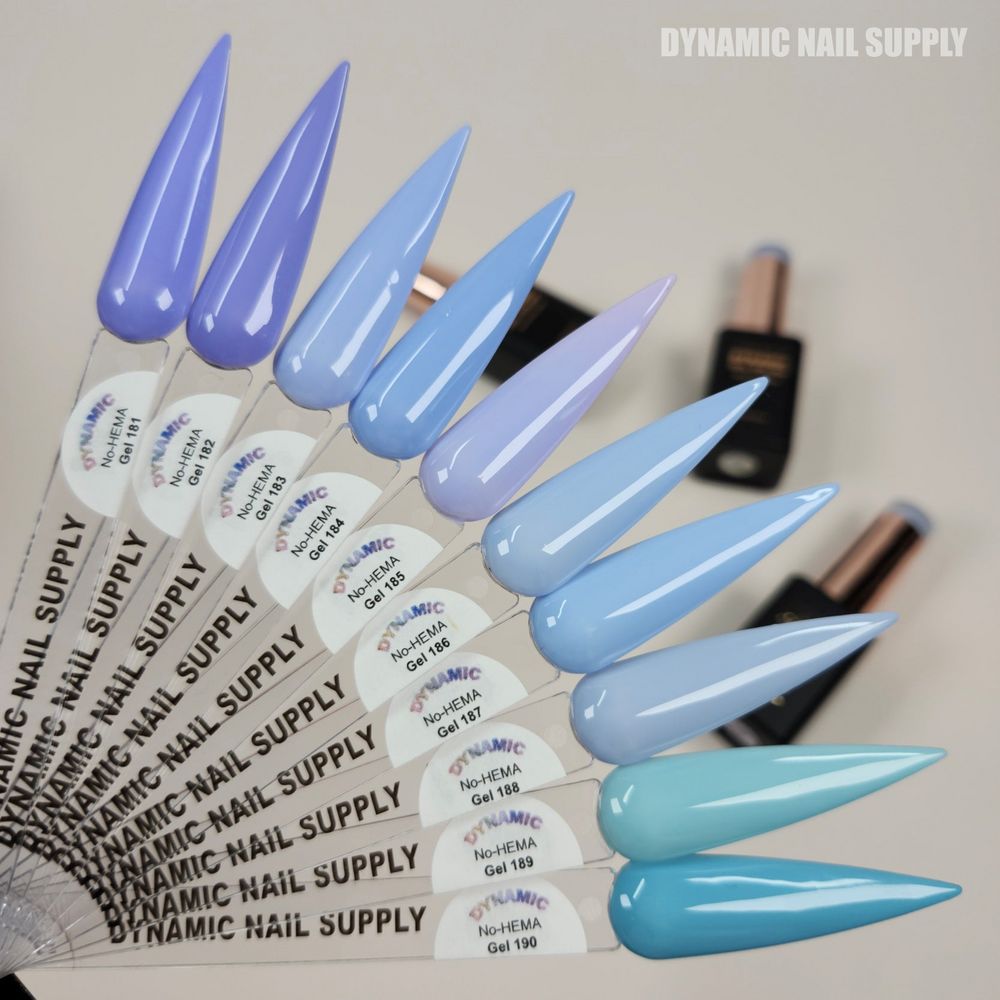
Gather a small flat synthetic brush (size 3–4), a tiny fan brush for softening, a fine liner for edge cleanup, gel base, and a high-gloss crème top coat. We recommend picking two tones from the cool, pastel-only palette that read well together on camera: a medium lilac and a baby sky blue, plus a pale lavender as a bridge shade on longer fades. The Dynamic No-HEMA Gel Polish set offers these cool blues and lavenders in opaque crème finishes; prices start at $8 and may change.
Layering strategy: Thin passes, controlled opacity
Our layered approach builds the ombré with predictable opacity and a camera-ready glossy finish. Work in thin passes rather than trying to blend a single heavy coat. Start with a sheer foundation of the palest shade to even out the canvas—this helps photos show consistent saturation across nail beds. Cure only long enough to tack the layer (60s–90s depending on lamp) so the next layer can still marry into it.
Step-By-Step Application
- Base coat: Apply a thin, even base and cure according to lamp specs. This creates adhesion without adding thickness.
- Foundation wash: Paint a micro-thin veil of the pale lavender over the whole nail; this evens tone and prevents patchy midtones in photos. Cure briefly.
- Block-in colors: Paint the lower third of the nail with medium lilac and the tip third with baby blue, leaving the center slightly overlapped. Keep brush strokes minimal and parallel to the nail for a cleaner gradient when photographed.
- Blend wet-to-wet: On the overlapped center, use the flat synthetic brush to make quick, feathered horizontal strokes that pull pigment toward the middle. Work while the layer is still wet to avoid dragging cured edges. If needed, use a tiny dab of the pale lavender as a blending mediator.
- Tack cure layers: Cure short passes after each blended pass—this locks the transition while letting subsequent layers fuse smoothly. Repeat block-in and blend until you reach the desired depth; two to three thin layers usually suffice thanks to the high coverage crème pigments.
- Refine edges: Use a fine liner dipped in corrector gel or a small brush with top coat to clean sidewalls and the cuticle line. Sharp, clean edges help the ombré read crisp in close-up photos.
Brush technique: feathering vs. patting
Feathering is our default: light, horizontal strokes using the flat brush to soften the join. For a softer airbrushed look, switch to a tiny fan brush and lightly pat the join zone—this breaks hard lines without losing pigment. Always work from more pigment toward less, pulling color into the lighter center rather than pushing light into dark.
Light and curing: think about reflections
Because these gels cure to a high-gloss crème, reflections are part of the look. Keep your lamp and curing positions consistent so the gloss builds evenly across sets. For photos, a single softbox or window light placed at a 45-degree angle to the nails preserves depth in the ombré while avoiding blown highlights. If a highlight line appears where two cures met, a rapid micro-sanding with a 240 grit buffer and a thin top-coat smoothing pass will even it out before the final seal.
Order the exact cool pastel set we use here for consistent shades and coverage
https://dynamicnailsupply.com/products/dynamic-no-hema-gel-polish-color-181-to-190
Spotlight: No-HEMA Gel 181
No-HEMA Gel 181 appears in the palette as one of the cool, pale options—ideal for the foundation wash or a soft bridge shade in a lavender to baby blue ombré. In photographs it reads as a very pale lavender-blue that helps transitions appear seamless without adding warmth. When used as the first veil layer it prevents midtone banding and keeps the final gloss looking clean and airy.
Finishing: top coat and photo-ready gloss
Finish with a high-gloss crème top coat applied in two thin strokes: one across the free edge and one across the nail face. Cure fully. For photography, wipe the inhibition layer if needed to boost reflectivity, then use a tiny amount of cuticle oil on the skin only—avoid oil on the nail itself when shooting to prevent unwanted glare. The set’s crème finish photographs flat and even, so your camera captures the ombré without sparkle or texture interference.
Troubleshooting common pitfalls
- If the gradient looks banded: add a micro-thin pale veil and feather again before curing.
- If pigment drags or pools: reduce brush load and work in shorter strokes; cure tack layers to stabilize.
- If the gloss shows an uneven highlight: micro-buff and reseal with a thin top coat.
Safety & handling
These are HEMA-free gel polishes; still, we recommend minimizing contact with skin during application and keeping the workspace ventilated. Follow standard salon PPE: gloves for removal work, proper lamp use, and professional soak-off procedures. Dispose of wipes and used applicators according to salon waste rules.
Who should buy
This workflow and the cool pastel palette suit salons that photograph nails for social posts, booking galleries, or bridal portfolios. Book this service for clients who want a soft, camera-friendly ombré—especially those who prefer cool tones without shimmer. The palette’s opaque crème pigments and high gloss make the lavender to baby blue ombre readable on camera and consistent across clients.