
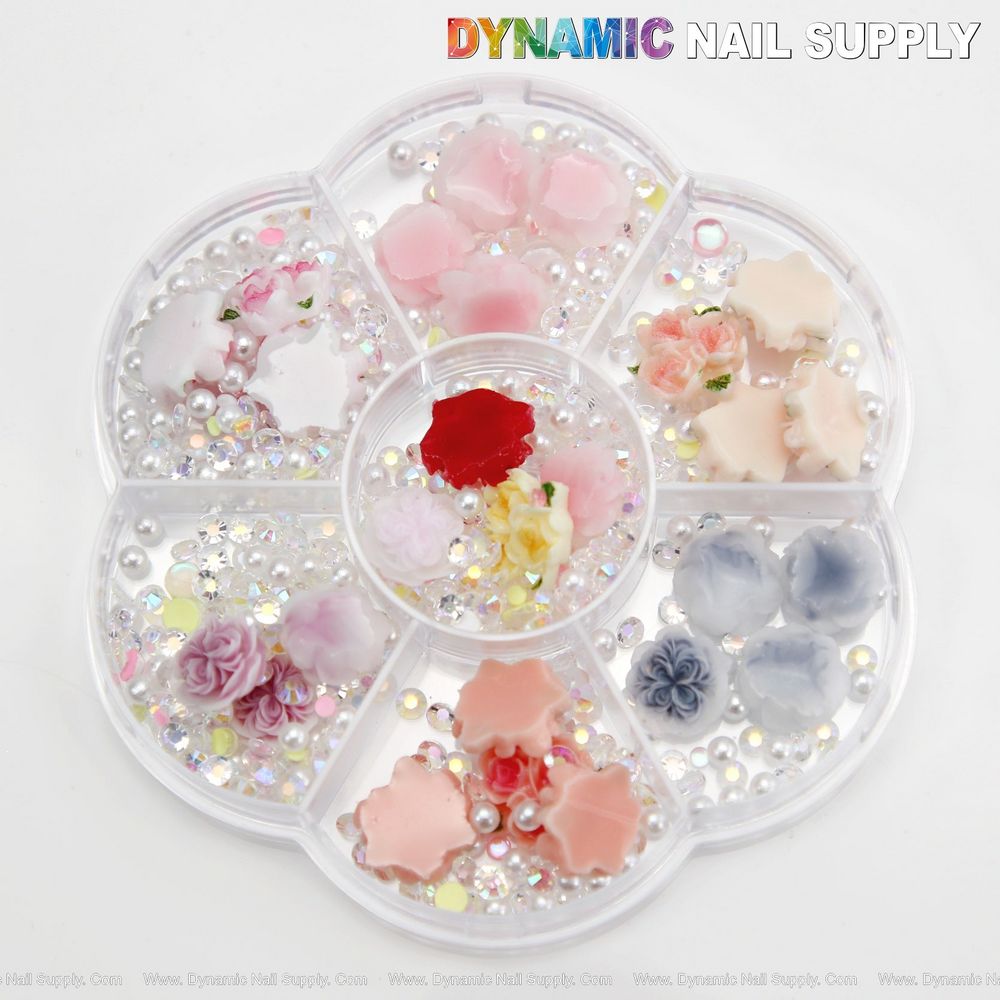
Small accents can transform a plain manicure into something memorable. Resin rose nail charms paired with AB rhinestone and pearl beads are an accessible way for beginners to add dimension, color, and sparkle to at-home or salon nail work.
Key terms simplified
Before you start, a few short definitions will make the process less intimidating:
- Resin rose: a tiny molded rose made from resin used as a decorative nail charm.
- AB rhinestone: a crystal with an iridescent coating (AB stands for Aurora Borealis) that reflects multiple colors.
- Pearl bead: a small bead with a pearlescent finish used to add a classic shimmer.
What’s included in the charm set
The set contains a mixed assortment of multi-color resin roses along with AB rhinestone and pearl bead accents, packaged for DIY nail art. If you’d like to add them to a practice kit or your retail shelf, you can order this nail charm set.
Step-by-step: applying resin rose nail charms (beginner method)
- Prepare the nail: File and buff nails to your desired shape, then push back cuticles and clean the surface with alcohol or a nail cleanser.
- Base color: Apply a base coat and your chosen polish or gel. Cure gel as directed. Let regular polish dry until tacky but not wet.
- Positioning: Plan where each charm will sit. Use a wax pencil, dotting tool, or tweezers for precise placement.
- Adhesive application: For full permanence, use gel adhesive or a small dab of nail glue where each charm will sit. Only use enough to secure the charm; excess glue can flow under edges and lift the design.
- Place charms: Gently press the resin rose, AB rhinestone, or pearl bead into the adhesive. Hold for a few seconds to set.
- Seal the look: For gel, encapsulate with builder gel or a generous top coat and cure. For regular polish, carefully apply a gel-style top coat or a thick clear top coat around—but not over—the highest points to avoid dulling shine.
- Finish and clean: Remove any excess adhesive from the skin using an orangewood stick and alcohol, then apply cuticle oil to restore moisture.
Practical usage tips for better results
- Plan your layout: Arrange charms on a practice nail or a piece of paper before committing. Mixing sizes and finishes builds visual interest.
- Work one nail at a time: Adhesives set quickly — prepare and place charms on each nail individually for more control.
- Mind the thickness: Heavier or taller charms may need extra adhesive or an encapsulation method to avoid catching and lifting.
- Mix textures: Pair a matte polish background with glossy resin roses, or use a clear glitter top coat to complement AB rhinestones for extra sparkle.
- Practice safe removal: Soak-off methods work best for gel encapsulation; for glued charms, gently lift and soften the glue before prying to reduce nail damage.
Who will love these charms?
This kit suits several users: a beginning nail artist who wants to try 3D accents without committing to hand-sculpting, a hobbyist building a collection of seasonal or themed accents, or a pro who needs small, ready-to-use embellishments for quick nail upgrades. Because the set is mixed and colorful, it’s especially handy for creative looks and bridal or event accent nails.
Care and safety notes
- Keep away from children: Small decorations present a choking hazard and should be stored out of reach.
- Avoid skin contact with adhesives: Use glue sparingly and avoid contact with cuticle skin. If adhesive touches skin, remove it promptly following product directions.
- Be mindful of wear: High-impact activities can dislodge charms; advise clients or yourself to take care during tasks that may snag the design.
- Store properly: Keep charms in a dry, cool container to prevent loss and maintain their appearance between uses.
Quick troubleshooting
- Charm lifts: Reapply adhesive and press firmly, or encapsulate with builder gel to secure larger pieces.
- Top coat dulls rhinestones: When sealing, avoid brushing thick coats directly over stones — instead, apply around them or use encapsulation for protection.
- Uneven surfaces: Place charm on a slightly domed gel layer or a bit of builder gel to create a level bonding area.
For a compact and playful way to add floral and pearl accents to manicures, a mixed resin rose with AB rhinestone and pearl bead set is a smart, beginner-friendly option. Available from Dynamic Nail Supply and currently priced at $5.99, these small decorations are an easy way to experiment with 3D nail art and seasonal looks.
Start small, practice placement on a spare tip, and gradually combine techniques—within a few tries you’ll be comfortable creating polished, eye-catching accents.